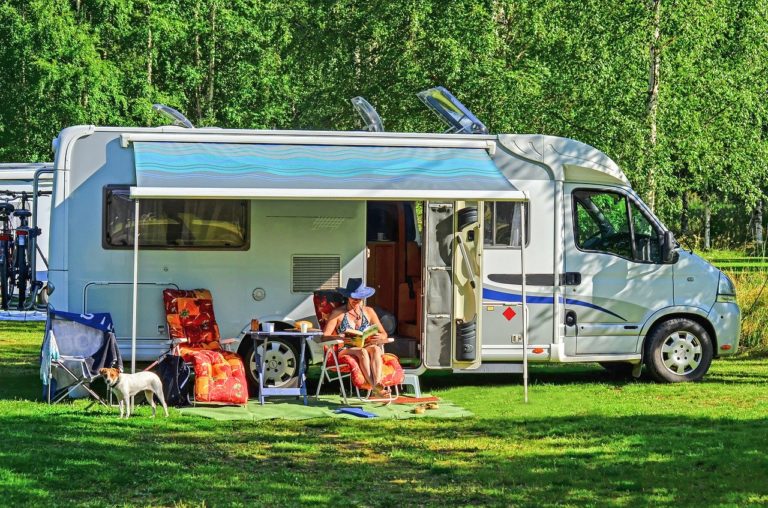
The freedom and joy of hitting the open road with a Sprinter van are unparalleled experiences. This lifestyle, often dubbed ‘van life,’ offers an exceptional blend of mobility, convenience, and intimacy with nature. For many, a Sprinter van becomes more than just a vehicle; it transforms into a cozy, compact home on wheels. But just like any home, it needs to be functional, and a crucial aspect of that functionality is an efficient energy solution.
While the allure of the van life comes with many perks, one challenge many face is ensuring consistent energy supply. No one wants to be in the middle of a scenic nowhere and run out of power. This is where solar setups come in, enabling you to harvest the sun’s energy to power up your necessities—from your cooling and heating systems to your gadgets and appliances.
In this article, we aim to shed light on this very issue, focusing specifically on the best solar setups for your Sprinter van. We’ll guide you through the various options, their pros and cons, and help you make an informed decision for a self-sustainable, comfortable, and truly liberating life on the road.

Why Go Solar?
When it comes to adopting a mobile lifestyle, one question often looms large: how do you power your life on the road in a sustainable, practical way? The answer increasingly points to one solution: solar energy. The merits of going solar are two-fold, offering both environmental and practical benefits that make it an ideal choice for van life or any mobile living situation.
Environmental Benefits
Low Carbon Footprint
One of the most compelling reasons to go solar is the reduction in your carbon footprint. Traditional electricity generation methods often rely on fossil fuels, which contribute to greenhouse gas emissions. In contrast, solar panels generate electricity by capturing sunlight, a process that emits zero greenhouse gases. By making the switch to solar, you’re effectively reducing your contribution to climate change.
Renewable Energy Source
Solar power is a renewable energy source, meaning it won’t run out as long as the sun keeps shining. Unlike finite resources like coal or natural gas, solar energy is abundant and available almost everywhere. Plus, harnessing the sun’s energy doesn’t deplete the Earth of its natural resources, making it a sustainable choice for the long term.
Practical Benefits
Off-Grid Living
Solar panels are a ticket to true freedom on the road. Equipped with a solar setup, you can venture far from civilization without worrying about finding an electrical hookup. This opens up a plethora of camping options, from secluded beaches to remote mountain vistas, giving you the luxury to park virtually anywhere your heart desires.
Energy Independence
There’s something incredibly liberating about producing your own electricity. You’re no longer dependent on external sources, which can be inconsistent or expensive. With a solar setup, you’re the master of your energy destiny, free to use power as you please without watching the meter tick.
Lower Utility Costs
Last but not least, let’s talk about the financial aspect. Though solar panels require an upfront investment, the long-term savings are substantial. Once your system is up and running, the electricity it generates is free. This means fewer stops at powered campsites and less reliance on fuel-powered generators, ultimately resulting in lower utility costs over time.
So, why go solar? Because it offers a responsible and practical way to live freely, with benefits that not only enhance your personal experience but also contribute positively to the world at large. Whether you’re a weekend warrior or a full-time road-dweller, solar power is an investment in a better, more sustainable future.
Understanding Solar Energy Basics
Embarking on the van life journey and considering going solar? Excellent choice! But before you make that investment, let’s dive into some of the key components and concepts behind a solar energy setup. Understanding these basics will help you make informed decisions and optimize your system for your specific needs.
Solar Panels
The most visible part of any solar setup is the solar panels themselves. These are the devices that capture sunlight and convert it into electricity. There are different types of solar panels to consider:
Monocrystalline vs. Polycrystalline
- Monocrystalline: These panels are made from a single crystal structure and are more efficient but generally come at a higher cost.
- Polycrystalline: These are made from different crystal structures, making them less efficient but also less expensive.
Power Ratings
Power ratings, usually measured in watts, indicate how much electricity a solar panel can produce under ideal conditions.
Efficiency
Efficiency measures how well a solar panel converts sunlight into electricity. Higher efficiency usually means you’ll need fewer panels to generate the same amount of power.
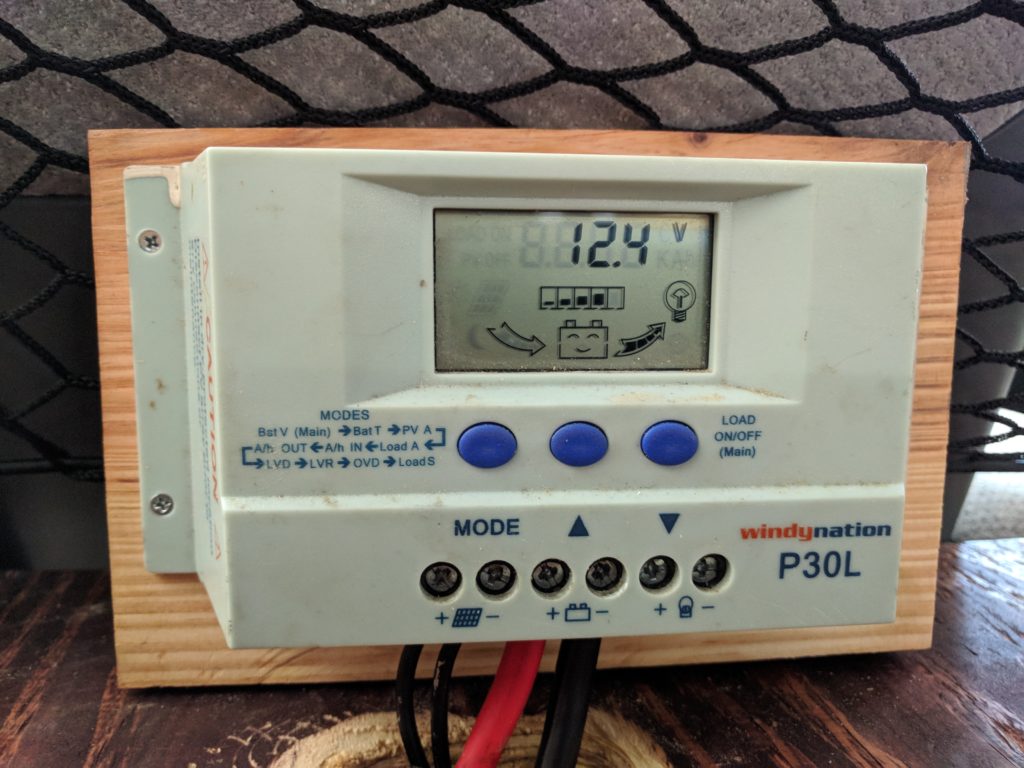
Charge Controllers
Once the solar panels generate electricity, a charge controller regulates the voltage and current coming from your panels to your batteries. There are two main types:
PWM (Pulse Width Modulation)
A simpler and generally cheaper option, PWM controllers are most effective when the solar panel array and battery voltage are closely matched.
MPPT (Maximum Power Point Tracking)
MPPT controllers are more efficient and allow for a greater range of voltages, but they are also more expensive.
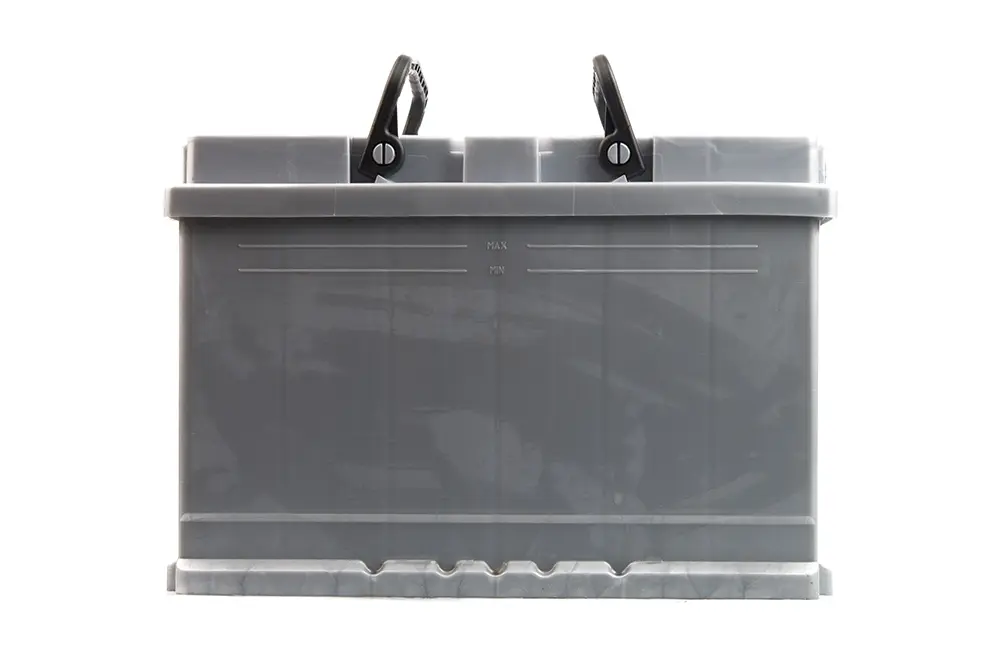
Batteries
Storing the electricity your solar panels generate is crucial for when the sun isn’t shining.
Lithium-ion vs. Lead Acid
- Lithium-ion: More expensive but offers higher efficiency, longer lifespan, and lighter weight.
- Lead Acid: Cheaper but heavier, with a shorter lifespan and lower efficiency.
Ampere-Hour Ratings
This indicates the amount of energy the battery can store. Higher ampere-hour ratings mean the battery can store more energy.
Inverters
The inverter converts the direct current (DC) from your solar panels and batteries into alternating current (AC), which is what most household appliances use.
Pure Sine Wave vs. Modified Sine Wave
- Pure Sine Wave: Produces a smooth, consistent current similar to what you’d get from the electrical grid. Ideal for sensitive electronics.
- Modified Sine Wave: Cheaper but less consistent, which can make some appliances run less efficiently.
Wattage Considerations
Make sure your inverter can handle the total wattage of all the devices you plan to run simultaneously.
Understanding these basic components and how they interact will help you tailor your solar setup to your specific needs, whether you’re a casual traveler or planning to live off-grid full-time. Armed with this knowledge, you’re one step closer to a more sustainable and independent van life experience!
Pre-Installation Steps for Your Sprinter Van
So, you’re sold on the idea of solar energy for your Sprinter van—that’s fantastic! But before you go clicking that “add to cart” button on various solar products, there are some crucial pre-installation steps you’ll need to take. Proper planning will save you time, money, and headaches down the road.
Assessing Energy Needs
Calculate Daily Power Consumption
Before you can pick your panels and batteries, you’ll need to figure out how much power you’ll be using on a daily basis. List all your electrical devices—lights, fans, laptops, fridge, etc.—and estimate how long you’ll be using each every day. There are handy online calculators that can help you convert this into watt-hours, giving you a sense of your daily power needs.
Sizing Your System
Once you have a grasp on your daily consumption, you can start sizing your solar system accordingly. The rule of thumb is to overestimate a bit to account for cloudy days and unexpected power needs.
Budget
Cost of Various Components
Solar setups can range from budget-friendly DIY kits to high-end, professional installations. Factor in the costs of panels, charge controllers, batteries, inverters, and any additional features like monitoring systems or smart controllers.
Installation Costs
If you’re not comfortable installing the system yourself, you’ll also need to budget for professional installation. The cost can vary widely depending on complexity and labor rates in your area.

Space Planning
Roof Layout
Your Sprinter van’s roof space will determine how many solar panels you can install. Consider the layout carefully, accounting for any vents, air conditioning units, or other obstructions. You’ll want to maximize sun exposure while ensuring the panels are securely attached.
Interior Compartment for Batteries and Controllers
Batteries and controllers need to be stored in a safe, easily accessible area. You’ll need to allocate space inside the van for these components, keeping in mind factors like ventilation, temperature control, and ease of access for maintenance.
By taking the time to accurately assess your energy needs, budget, and space limitations, you’ll set yourself up for solar success. These pre-installation steps are the foundation of a reliable, efficient system that will serve you well in your travels and adventures.
The Guide to Solar Setups for Every Budget
Navigating the world of solar setups for your Sprinter van can be daunting, especially when it comes to costs and components. Whether you’re on a shoestring budget or have some money to splurge, there’s a setup to meet your needs. Let’s delve into three different tiers: Budget-Friendly, Mid-Range, and Premium.
Budget-Friendly Setup
For those just starting out or traveling on a tight budget, a cost-effective solar setup is entirely possible. You could go for 2 x 100W polycrystalline solar panels, a PWM charge controller, and a couple of 100Ah lead-acid batteries. To round it off, a 500W modified sine wave inverter would suffice. You’d be looking at an estimated total cost of around $550. The upside to this budget-friendly route is its lower initial investment and relative ease of installation. However, keep in mind that you’ll be compromising on efficiency and lifespan, and your options for energy expansion will be limited.
Mid-Range Setup
If you’ve got a bit more to invest and want a good balance of cost and performance, a mid-range setup could be ideal. With this, you’d upgrade to 3 x 150W monocrystalline solar panels paired with a more efficient MPPT charge controller. Opt for a 200Ah lithium-ion battery and a 1000W pure sine wave inverter for better reliability. The total estimated cost hovers around $1700. The pros here include a long-lasting setup with high efficiency, suitable for moderate energy consumption. The cons include a moderately high initial cost and a more complicated installation process.
Premium Setup
For those who want the best of the best, a premium setup offers the most efficiency and the longest lifespan of components. You could equip your Sprinter van with 4 x 200W monocrystalline solar panels, a high-end MPPT charge controller with smart features, and two 200Ah lithium-ion batteries. A 2000W pure sine wave inverter with smart features will ensure you’re ready for high energy consumption activities. This top-tier setup comes in at an estimated cost of around $3300. The advantages are many: top-notch efficiency, smart features for optimized energy use, and the capability to handle high energy consumption needs. The downside, of course, is the high initial investment and the recommendation for professional installation.
By evaluating your needs and understanding the advantages and disadvantages of these three tiers, you can choose the solar setup that’s just right for your Sprinter van and your lifestyle.
DIY Installation Tips for Your Solar Setup
Rolling up your sleeves and planning to install your solar setup yourself? Kudos! DIY installation can be a rewarding experience, both in terms of skill-building and savings. However, you’ll want to be well-prepared to ensure a smooth and safe installation. Below are some key pointers to help you out.
Tools You’ll Need
To start, make sure you’ve got the right tools at hand. Here’s a quick list:
- Drill and drill bits for attaching solar panels and components
- Screwdriver set (both flat and Phillips)
- Adjustable wrench for tightening bolts
- Wire strippers and crimpers for electrical work
- Multimeter for electrical testing
- Safety gloves and protective eyewear
- Ladder for roof access
Safety Precautions
Before you get started, you’ll want to take some safety precautions. Always turn off any connected power sources to avoid electrical shock. Wear safety gloves and protective eyewear to shield yourself from any sparks or sharp edges. Lastly, make sure you’re working in a well-ventilated area, especially if you’re dealing with batteries, which can emit harmful gases.
Step-by-Step Guide
- Panel Placement: Begin by marking out where your solar panels will go on the roof of your Sprinter van. Make sure they’re positioned to get optimal sunlight and are clear of any obstructions like vents or antennas.
- Attach Mounting Brackets: Drill holes at the marked spots and attach the solar panel mounting brackets. Seal any drilled holes with a sealant to prevent leaks.
- Install Solar Panels: Securely attach the solar panels to the mounting brackets. Make sure they’re tightly bolted in place to withstand wind and vibrations during travel.
- Route the Cables: Run the solar panel cables to where you’ll be placing your charge controller, ideally close to the batteries. Use cable clips to keep them in place.
- Connect Charge Controller: Follow the manufacturer’s instructions to connect the solar panels to your chosen charge controller. This is a crucial component that regulates the flow of electricity from the panels to the batteries.
- Battery Connection: Connect the charge controller to your batteries. Double-check your connections and polarities to avoid any mistakes.
- Inverter Installation: Finally, connect your inverter to the batteries. This will convert the stored DC power into AC power for your appliances.
- Test the System: Use your multimeter to test voltage and ensure everything is working as it should be.
- Final Touches: Secure all loose wires and components. Clean up your workspace and dispose of any waste responsibly.
By following these steps and taking necessary precautions, you’ll set up a robust solar system that can take you further in your Sprinter van adventures. Just remember, when in doubt, consult professionals or reach out to online communities for advice. Happy installing!

Opting for Professional Installation: What You Need to Know
While a DIY installation of a solar setup can be a fulfilling project, it’s not for everyone. If the technical aspects intimidate you, or if you simply want to ensure a flawless, warranty-backed installation, turning to professionals might be your best bet. Below are some insights into when to consider professional help, what costs you might incur, and how to find a reliable installer.
When to Consider Professional Help
- Complex Systems: If you’re opting for a more complex, high-end solar setup with multiple components and smart features, professional installation can be invaluable.
- Safety Concerns: Electrical work can be hazardous if you’re not trained. Professionals are skilled and trained in adhering to safety norms.
- Time Constraints: If you’re on a tight schedule and need the installation done quickly and efficiently, a pro can make that happen.
- Warranty Requirements: Some manufacturers may require professional installation to validate the warranty on your components.
Estimated Costs
The cost of professional installation can vary widely depending on the complexity of your setup and the rates of the service provider. For basic installations, you could expect to pay anywhere from $200 to $500. More complex systems with high-end components could push the installation costs up to $1,000 or even more. Always ask for detailed quotes upfront and check if the installation warranty is included in the cost.
How to Find a Reliable Installer
- Referrals: One of the best ways to find a reliable installer is through word-of-mouth referrals from friends or family who’ve had solar systems installed.
- Online Reviews: Websites like Yelp and Google Reviews can offer valuable insights into customer satisfaction and service quality.
- Certifications: Look for installers who have certifications from reputable organizations, as this ensures they meet certain standards in their work.
- Quotes and Consultations: Always ask for a detailed quote and perhaps a site consultation. A good installer will want to understand your specific needs and limitations before giving a quote.
- Ask Questions: Don’t hesitate to ask about their experience, the kinds of setups they’ve installed, and what their service warranty covers.
Opting for a professional installation might add to your upfront costs, but for many, the peace of mind and quality assurance are well worth it. Plus, with experts handling your setup, you can hit the road with confidence, knowing your Sprinter van’s solar system is optimized for peak performance.
Case Studies: Real-World Insights from Solar-Powered Sprinter Van Owners
Learning from those who have already navigated the solar setup journey can offer invaluable insights. Below are some case studies that feature interviews and stories from Sprinter van owners who have successfully made the switch to solar power. These real-world examples also shed light on energy consumption and potential savings.
Sarah and Tim’s Weekend Getaways
Sarah and Tim are weekend warriors who love escaping the city in their Sprinter van. They opted for a budget-friendly setup, featuring 200W polycrystalline panels and a basic PWM charge controller. Though their system is modest, it’s more than enough to power their weekend needs—lights, phone charging, and a small fridge.
Energy Metrics:
- Daily Consumption: Around 30Ah
- Savings: Approximately $20/month on fuel for a generator they no longer need
The Johnston Family’s Cross-Country Adventure
The Johnsons are a family of four who decided to take a year off and travel the country. They went for a mid-range setup with 450W monocrystalline panels and a MPPT charge controller. With more electrical needs including cooking appliances and laptops for remote work and school, their system needed to be robust.
Energy Metrics:
- Daily Consumption: Around 80Ah
- Savings: Roughly $45/month compared to relying solely on campsite electrical hookups

Digital Nomad Emily
Emily is a digital nomad who works and lives full-time in her Sprinter van. Needing reliable power for her work essentials like a laptop and Wi-Fi router, Emily invested in a premium setup. Her system includes 800W monocrystalline panels, a high-end MPPT charge controller, and lithium-ion batteries.
Energy Metrics:
- Daily Consumption: Around 120Ah
- Savings: An estimated $80/month, as she no longer needs to frequently visit cafes for power or rent coworking spaces
These case studies demonstrate that whether you’re a casual traveler or living full-time in your Sprinter van, a solar setup tailored to your needs can offer both freedom and savings. The metrics may vary based on individual lifestyles and energy needs, but the overarching theme remains: solar power can significantly enhance your van life experience.
Maintenance and Troubleshooting: Keeping Your Solar Setup in Peak Condition
Once your solar setup is up and running, the journey doesn’t end there. Regular maintenance is key to ensuring your system performs optimally and lasts as long as possible. Here’s your guide to maintaining your Sprinter van’s solar system and some common troubleshooting tips.
Maintenance Tips
- Regular Cleaning: Solar panels can accumulate dirt, bird droppings, and other debris that can hinder their efficiency. Make it a habit to clean your panels regularly, using a soft cloth and mild soap.
- Battery Upkeep: Whether you have lithium-ion or lead-acid batteries, they require some level of maintenance. For lead-acid batteries, make sure to check the water levels regularly and top them off with distilled water as needed. Lithium-ion batteries generally require less upkeep but do keep an eye on their state of charge and temperature.
- Software Updates: If your system includes smart components like an intelligent charge controller or inverter, ensure they are up-to-date with the latest firmware. Manufacturers often release updates to fix bugs or improve efficiency.
- Connection Checks: Every so often, take the time to check all connections and cables. Loose connections can lead to reduced performance or even safety risks.
- Routine Inspections: Aside from your regular checks, consider having your system inspected by a professional annually to catch any issues before they become major problems.
Troubleshooting Tips
- Low Power Output: If your system is not generating as much power as it should, check for obstructions like shade or dirt on the panels. Also, assess whether your batteries are in good condition.
- Inverter Issues: If your inverter is not functioning properly, double-check its connections and look for any error messages. Some issues can be resolved with a simple restart.
- Charge Controller Alerts: If your charge controller is showing warnings or error messages, consult the user manual or manufacturer’s website for guidance. Often, these messages are codes that can point you toward the issue.
- Appliance Failures: If an appliance is not working, test it with an alternate power source to determine whether the issue is with the appliance or your solar setup.
Remember, regular maintenance can help preempt many issues, saving you time and money in the long run. When in doubt, consult the user manuals for your components or reach out to the manufacturer’s customer support for help.
Troubleshooting Common Issues: How to Tackle Solar Setup Snags
So you’ve got your solar setup installed and running—great! But like any system, there might be some hiccups along the way. To keep you powered up and worry-free, let’s explore some common issues and how to troubleshoot them.
Low Power Output
Experiencing lower than expected power output can be frustrating. Here’s how to approach it:
- Check for Obstructions: The first step is to ensure that your solar panels are free of dirt, leaves, or any other obstructions that might be blocking sunlight.
- Assess the Weather: Solar panels are less effective during cloudy or rainy days. Make sure to consider weather conditions when evaluating your system’s performance.
- Panel Alignment: Ensure that your panels are aligned to capture the maximum amount of sunlight. Incorrect alignment can significantly reduce power generation.
- System Check: Look over the cabling and connections between the panels, charge controller, and batteries. Loose or damaged cables can affect the power output.
- Consult the Manufacturer: If all else fails, it might be a technical issue best left to the experts. Contact the manufacturer or installer for guidance.
Inverter Issues
Inverters convert the DC power generated by your solar panels to AC power for your appliances. Here’s what to do if you’re facing issues:
- Error Messages: Take note of any error messages displayed on the inverter. These can give you clues about what’s wrong.
- Check Connections: Loose or improper connections can cause issues. Make sure all wires are properly connected and tightened.
- Power Cycle: Sometimes, a simple restart can solve the problem. Turn off the inverter and then turn it back on to see if the issue persists.
- Consult the Manual: Your inverter’s user manual can offer specific troubleshooting steps. Keep it handy for quick reference.
- Professional Help: If the issue remains unresolved, consult a professional. Inverter issues can be complex and might require expert attention.
Battery Draining Quickly
If your batteries seem to be losing charge faster than usual, here are some steps to troubleshoot:
- Check Electrical Loads: Make sure you’re not overloading your system. Too many appliances or devices running at the same time can quickly drain your batteries.
- Battery Health: Batteries degrade over time. Use a multimeter to check their voltage and health.
- Charge Controller Settings: Incorrect settings on your charge controller can affect how your batteries are charged and maintained. Make sure to configure them correctly.
- Temperature: Extreme temperatures can affect battery performance. Make sure your batteries are stored in a location where the temperature is regulated.
- Consult a Professional: Battery issues can be complex and may require specialized testing equipment for an accurate diagnosis. When in doubt, consult a professional.
Tackling these common issues will go a long way in ensuring that your solar setup remains efficient and reliable. And remember, regular maintenance and periodic checks can prevent many of these problems from arising in the first place.
Conclusion: Power Your Sprinter Van Adventures Sustainably
Solar setups in Sprinter vans aren’t just a trend; they’re a lifestyle choice that brings an array of benefits. From the environmental perks of a low carbon footprint to the practical advantages of energy independence, going solar is a game-changer for anyone looking to make the most out of van life. Plus, with various options tailored to different budgets and needs, solar power is more accessible than ever.
Taking the solar plunge doesn’t just mean you’re harnessing the sun; you’re also capturing the freedom to roam off-grid, reducing your utility costs, and contributing to a more sustainable future. Whether you’re a weekend explorer, a digital nomad, or somewhere in between, a solar setup tailored to your needs can significantly enhance your Sprinter van experience.
So why wait? Take the next steps in planning your solar setup. Evaluate your energy needs, choose the components that suit you best, and decide whether a DIY installation or professional help is the right path for you. Once you’re up and running, you’ll wonder how you ever lived without it.